Install a web server for Python Applications

by Maxime Decooman
Note: This setup is done on a brand new server instantiated at Digitalocean(DO). Once you have added your ssh key in the DO Droplet panel at creation, you will login as root. If you are not root, you need to be in the sudoer group and use the sudo command. I have written it for convenience.
Install Python 3.13 on Ubuntu 24.04
Update first your package manager and packages lists:
sudo apt update && sudo apt upgrade
- Reboot
- Make sure you have all these libraries to have a successful build (curl, xz-utils and wget are usually part of the distribution already):
sudo apt install -y make build-essential libssl-dev zlib1g-dev \
libbz2-dev libreadline-dev libsqlite3-dev llvm libncurses5-dev \
libncursesw5-dev tk-dev curl xz-utils wget
Donwload the latest python (3.13.1 at the time of this update):
cd /usr/src
sudo wget https://www.python.org/ftp/python/3.13.1/Python-3.13.1.tgz
Extract archive:Once the download is finished, extract the archive file content.
sudo tar -xzf Python-3.13.1.tgz
Prepare the source code and use the '--enable-optimizations' option witch enable additional supports like SSL and bz2.
cd Python-3.13.1
sudo ./configure --enable-optimizations
Compile and install. Use 'altinstall', to install it as a separate Python avoiding overwriting the default Python installation.
sudo make -j4 && sudo make altinstall
or
sudo make && sudo make altinstall
Note: make -j4, the -j option followed by a number (in this case, 4) tells make to execute multiple jobs concurrently. This means make will run up to four jobs in parallel. If you have a multi-core processor, using -j with a number equal to or slightly more than the number of CPU cores can significantly speed up the compilation process.
Have a cup of coffee, or two...
Test all is fine
python3.13 --version
# > python3.13.1
the current version of python is
python --version
# > ptyhon 3.13.1
update-alternatives --install (optional)
You can manage which version of Python is invoked when you use the python3 command. Personally I do not modify the python3 command on production servers and leave it to the default system version. However on other systems I may use it temporarilly for different purposes:
Add the symlinks
# update-alternatives --install <link> <name> <path> <priority>
# Add the symlinks
sudo update-alternatives --install /usr/bin/python3 python3 /usr/bin/python3.10 110
sudo update-alternatives --install /usr/bin/python3 python3 /usr/local/bin/python3.13 100
Check all went smoothly
sudo update-alternatives --display python3
# > python3 - auto mode
# >  link best version is /usr/bin/python3.10
# >  link currently points to /usr/bin/python3.10
# >  link python3 is /usr/bin/python3
# >/usr/bin/python3.10 - priority 110
# >/usr/local/bin/python3.13 - priority 100
Change which symlink will answer to python3 command:
sudo update-alternatives --config python3
Note: to undo
sudo update-alternatives --remove python /usr/local/bin/python3.13
Have a walk...
Create a django project
Add a user
Our user for the sake of this article is called Julius.
adduser julius
# You'll be prompted to enter and confirm a password for the new user, as well as to fill out some additional optional information.
- Grant sudo privileges to allow the new user to perform administrative tasks, add them to the sudo group.
usermod -aG sudo julius
Switch to the New Account
Switch to the newly created user account with the following command:
su - julius
# check you are in the correct directory that should be /home/julius
pwd
Install a Python virtual environment and create a new Django project
# create a project directory
mkdir mysite

# Go into the directory
cd mysite

# install the virtual environment in a hidden folder .venv
python3.12 -m venv .venv
Activate the virtual environment:
source .venv/bin/activate
Install Django
With the virtual environment activated, you can now install Django.
pip install django
Start a new Django project by running:
# Replace mysite with your project's name.
django-admin startproject mysite .

# The period at the end is to create the project in the same directory without creating a new one with the project name.
Edit the settings (i use vi or vim, use nano orthe editor you like):
vi mysite/settings.py
Change the line ALLOWED_HOSTS = [] with:
# ALLOWED_HOSTS = []
ALLOWED_HOSTS = [localhost, server_ip_address, mysite.com]

# server_ip_address: the IP address of your server (not advised in production).
# mysite.com: the name of your server url in your domain DNS server
Or, if you are lazy, you can also set * but don't do that in production:
ALLOWED_HOSTS = ['*']
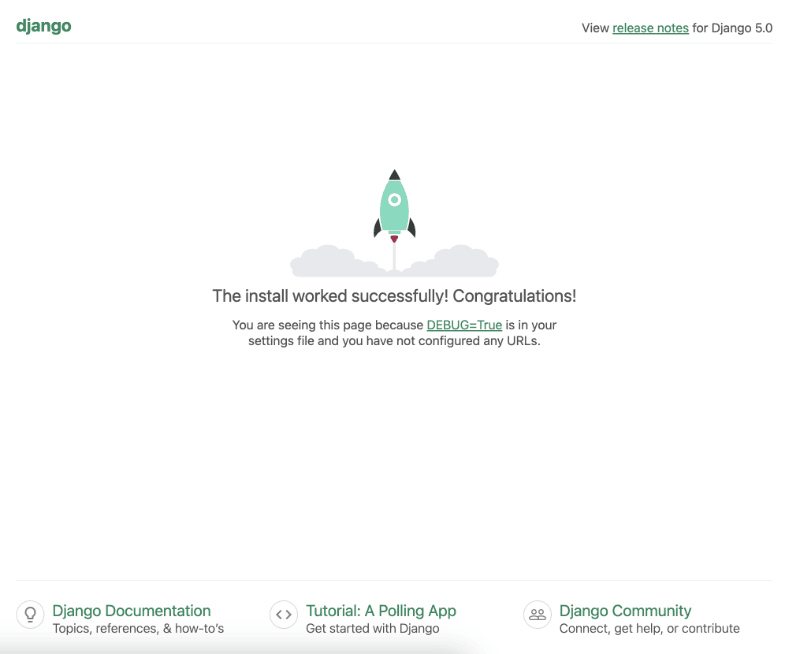
Run the Development Server
At this point, you should have a (.venv) as a prefix of your terminal prompt now:

- Change into your project directory and run Django's development server.
cd mysite
python manage.py runserver 0.0.0.0:8000
Your Django project should now be accessible via http://your_server_ip:8000 in a web browser, If you cannot access, verify you do not have a firewall installed and open the TCP port 8000 (for the time of the test)
When you are finished exploring, hit CTRL-C in the terminal window to shut down the development server.
Install and test gunicorn
Install gunicorn
pip install gunicorn
# in /home/julius/mysite
cd ~/mysite  # if you went away
gunicorn --bind 0.0.0.0:8000 mysite.wsgi

Like you did previously, you should be able to access your site at http://your_server_ip:8000 but running under gunicorn this time.
Note: Deactivate your Python virtual environment when you're done by executing:
deactivate
The next steps will cover how to configure a web server (Nginx) that will serve as a proxy to the WSGI application server (Gunicorn).
Install and configure Nginx
Install Nginx
sudo apt install nginx
make nginx to start automatically
sudo systemctl enable nginx
Create the config file for your site
sudo vi /etc/nginx/sites-available/mysite
Here is a minimalistic config file that should suffice for this tutorial:
#  /etc/nginx/sites-available/mysite
server {
    listen 80;
    server_name server_domain_or_IP;

    location = /favicon.ico { access_log off; log_not_found off; }
    location /static/ {
        root /home/julius/mysite;
    }

    location / {
        include proxy_params;
        proxy_pass http://unix:/run/gunicorn-mysite.sock;
    }
}
Save and close the file once done. You need to enable the site so nginx will start listening for requests. You enable the file by linking it to the sites-enabled directory:
sudo ln -s /etc/nginx/sites-available/mysite /etc/nginx/sites-enabled
Test your configuration for syntax errors:
sudo nginx -t
If no errors you can restart Nginx:
sudo systemctl restart nginx
Setting up supervisor
Install supervisor
sudo apt install supervisor
Make supervisor to start automatically with the system
sudo systemctl enable supervisor
Create a supervisor configuration file using vi editor (or the one you prefer).
sudo vi /etc/supervisor/conf.d/mysite.conf
Add the following configuration to the file. The details are matching the example used for mysite path of configuration and the user. Using this configuration, you will be running your Python project with Gunicorn, and instead of using the IP address for your application, you will be running the project like a sock file.
[program:mysite]
command=/home/julius/mysite/.venv/bin/gunicorn --access-logfile - --workers 3 --bind unix:/run/gunicorn-mysite.sock mysite.wsgi:application
directory=/home/julius/mysite
user=root
group=www-data
autostart=true
autorestart=true
stdout_logfile=/var/log/supervisor/mysite.log
stderr_logfile=/var/log/supervisor/mysite-error.log
Save and close the file when you are done.
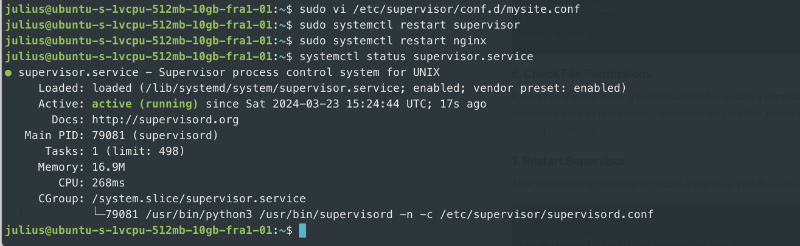
Now restart the supervisor and nginx services using the below commands to apply new changes.
sudo systemctl restart supervisor
sudo systemctl restart nginx

# check supervisor is running correctly
systemctl status supervisor
 Another useful command to check and verify the list of processes under the supervisor. You should see the “mysite” process running.
sudo supervisorctl status
#> mysite                           RUNNING   pid 79290, uptime 0:01:09
Finally, you can now visit your site at http://your_server_ip_or_domain_name, which is currently being served by Gunicorn and proxied by Nginx.
Have a big treat, you did it so far 🚀...
There are still a "few" things to do, especially to secure the setup and enable https but that is enough to get you started.